Samba Shares with Windows 11
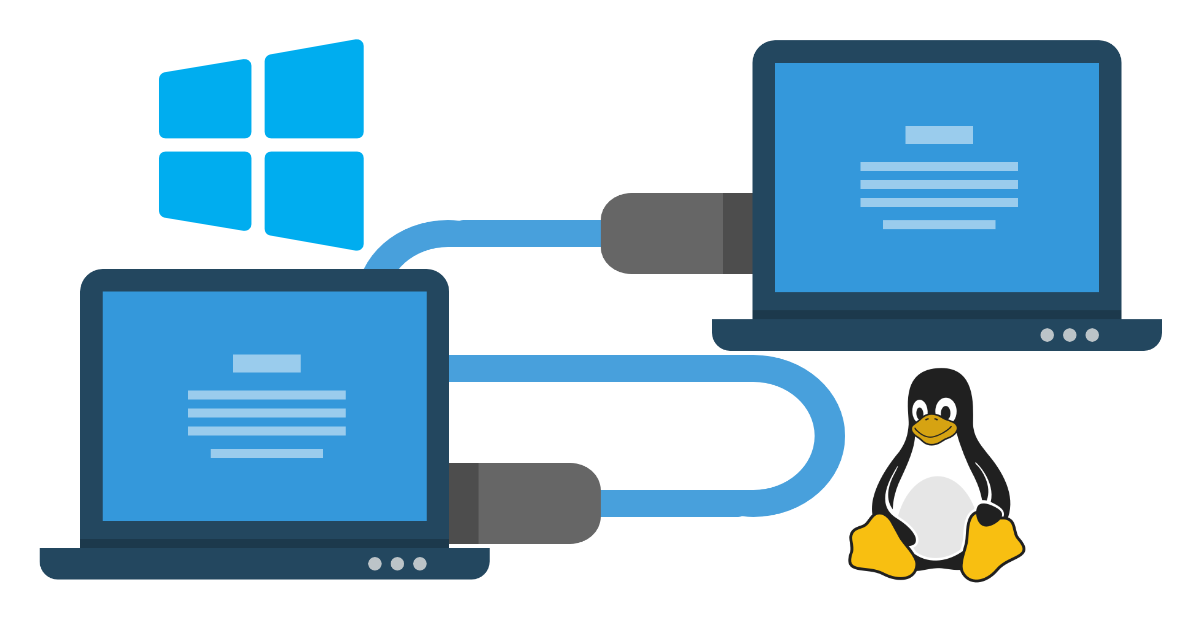
SAMBA with Debian 12
SAMBA is an essential tool for software developers who need to enable file sharing across different operating systems within a network. It allows for seamless integration and file sharing between Linux/Unix and Windows clients. This tutorial will guide you through the steps to install and configure SAMBA on Debian, ensuring efficient file-sharing capabilities within your network.
Installing SAMBA
The first step in setting up SAMBA is to install the necessary packages. This can be done using Debian’s package management system. Open a terminal and run the following command:
1
2
sudo apt update
sudo apt install samba -y
You can check the status of samba by running the following command:
1
sudo systemctl status smbd
The Samba configuration is located in the /etc/samba/smb.conf file. Edit the default configuration using the command below:
1
sudo truncate -s 0 /etc/samba/smb.conf
1
sudo nano /etc/samba/smb.conf
Below is a sample configuration. You will need to edit this to fit your needs.
1
2
3
4
5
6
7
8
9
10
11
12
13
14
15
16
17
18
19
20
21
22
23
24
25
26
27
28
29
30
31
32
33
34
35
36
37
38
39
40
41
42
43
44
45
46
47
48
#
# Sample configuration file for the Samba suite for Debian GNU/Linux.
#

#======================= Global Settings =======================

[global]

### Browsing/Identification ###
   workgroup = WORKGROUP

#### Networking ####
   interfaces = 10.0.0.0/24 enp4s0
   bind interfaces only = yes

####### Authentication #######
   server role = standalone server
   map to guest = bad user

#### Printers ####
   load printers = no
   printing = bsd
   printcap name = /dev/null
   disable spoolss = yes

#======================= Share Definitions =======================

[home]
   comment = Home Directories
   admin users = administrator
   create mask = 0644
   directory mask = 0775
   force group = administrator
   force user = administrator
   guest ok = Yes
   path = /home/administrator
   read only = No

[opt]
   comment = /opt Directories
   admin users = administrator
   create mask = 0644
   directory mask = 0775
   force group = administrator
   force user = administrator
   guest ok = Yes
   path = /opt
   read only = No
Restart Samba using the following command:
1
sudo systemctl restart smbd
Verify the Samba Configuration
Once changes have taken effect on the config file, it is recommended that you test it by issuing the following command:
1
sudo testparm
Add Rules to UFW
1
2
3
4
sudo ufw allow from 10.0.0.0/24 to any port 137 proto tcp
sudo ufw allow from 10.0.0.0/24 to any port 138 proto tcp
sudo ufw allow from 10.0.0.0/24 to any port 139 proto tcp
sudo ufw allow from 10.0.0.0/24 to any port 445 proto tcp
Verify your shanges with the following:
1
sudo ufw status
Network Discovery
wsdd is a service by christgau on GitHub, which implements a Web Service Discovery host daemon for Linux. This enables Samba hosts to be found by Web Service Discovery Clients like Windows 11.
Change to /tmp directory:
1
cd /tmp
Download and unzip the archive:
1
2
wget https://github.com/christgau/wsdd/archive/master.zip
unzip master.zip
Rename wsdd.py to wsdd:
1
sudo mv wsdd-master/src/wsdd.py wsdd-master/src/wsdd
Copy to /usr/bin:
1
sudo cp wsdd-master/src/wsdd /usr/bin
Copy wsdd to /etc/systemd/system:
1
sudo cp wsdd-master/etc/systemd/wsdd.service /etc/systemd/system
Open wsdd.service in nano and change to the following and add your –interface <name>
1
sudo nano /etc/systemd/system/wsdd.service
1
2
3
4
5
6
7
8
9
10
11
12
13
14
15
16
[Unit]
Description=Web Services Dynamic Discovery host daemon

After=network-online.target
Wants=network-online.target

[Service]
Type=simple

ExecStart=/usr/bin/wsdd --interface enp4s0 --ipv4only --shortlog
DynamicUser=yes
User=wsdd
Group=wsdd

[Install]
WantedBy=multi-user.target
Save and exit (press CTRL + X, press Y and then press ENTER)
Start and enable wsdd:
1
2
sudo systemctl start wsdd
sudo systemctl enable wsdd
Output:
1
Created symlink /etc/systemd/system/multi-user.target.wants/wsdd.service → /etc/systemd/system/wsdd.service
Now check that the service is running:
1
sudo service wsdd status
Output:
1
2
3
4
5
6
7
8
9
10
11
wsdd.service - Web Services Dynamic Discovery host daemon
Loaded: loaded (/etc/systemd/system/wsdd.service; enabled; vendor preset: enabled)
Active: active (running) since Wed 2020-06-10 10:51:39 CEST; 8s ago
Main PID: 40670 (python3)
Tasks: 1 (limit: 6662)
Memory: 10.8M
CGroup: /system.slice/wsdd.service
└─40670 python3 /usr/bin/wsdd --shortlog

jun 10 10:51:39 debian systemd[1]: Started Web Services Dynamic Discovery host daemon.
jun 10 10:51:40 debian wsdd[40670]: WARNING: no interface given, using all interfaces
Configure IpTables
1
lsmod | grep pkttype
Type the following command as root user to add:
1
sudo modprobe xt_pkttype
1
sudoedit /etc/ufw/before.rules
Firewall Setup
Traffic for the following ports, directions and addresses must be allowed.
- incoming and outgoing traffic to udp/3702 with multicast destination:
239.255.255.250for IPv4ff02::cfor IPv6
- outgoing unicast traffic from udp/3702
- incoming to tcp/5357
1
2
3
4
5
6
7
8
9
# allow MULTICAST WS-Discovery for service discovery (be sure the MULTICAST line above
# is uncommented)
-A ufw-before-input -m pkttype --pkt-type multicast -j ACCEPT
-A ufw-before-input -p udp -s 10.0.0.0/24 --dport 3702 -j ACCEPT
-A ufw-before-input -p udp -s 10.0.0.0/24 --sport 3702 -j ACCEPT
-A ufw-before-input -p tcp -s 10.0.0.0/24 --dport 5357 -j ACCEPT
-A ufw-before-input -p tcp -s 10.0.0.0/24 --sport 5357 -j ACCEPT

# you will need to replace the ip address above with your own ip.
Disable SMB Signing
SMB signing is required by default on the latest builds of Windows 11. All Windows environments support SMB signing. However, if your environment uses third-party servers and the third-party server doesn’t support SMB signing, you can’t connect to the remote share.
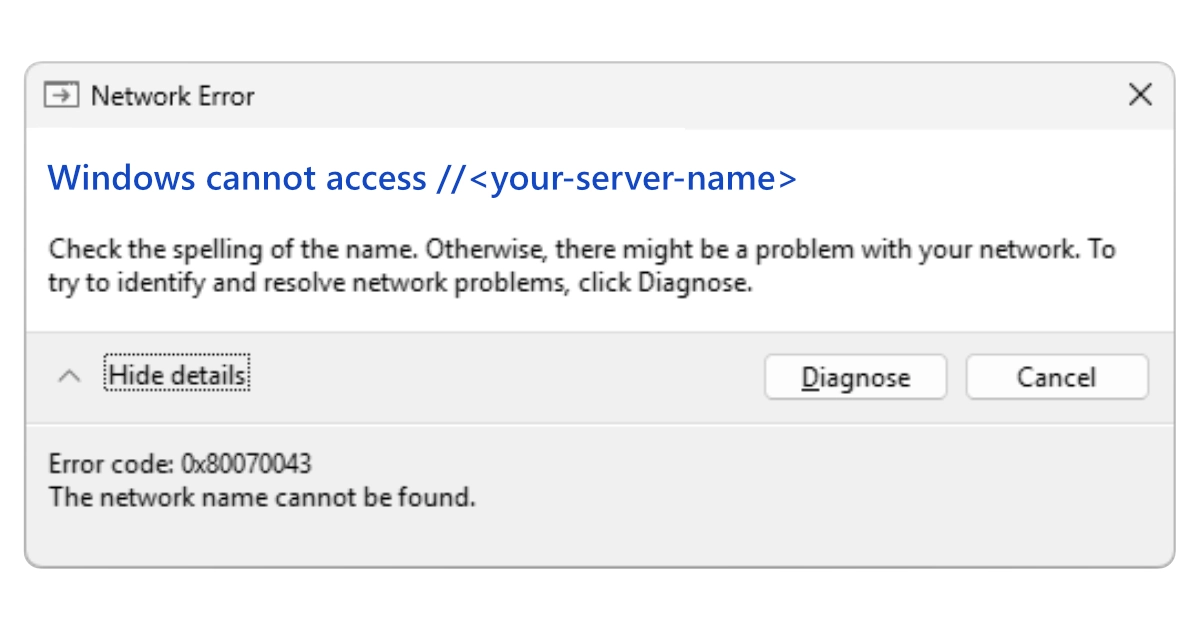
Requiring SMB signing also disables guest access to shares. In these cases, you must disable SMB signing manually to restore access for guest accounts. You can manually disable SMB signing through PowerShell.
1
2
Set-SmbClientConfiguration -RequireSecuritySignature $false
Set-SmbServerConfiguration -RequireSecuritySignature $false
Verify SMB Signing
1
2
Get-SmbClientConfiguration | FL RequireSecuritySignature
Get-SmbServerConfiguration | FL RequireSecuritySignature
If the returned information is True, then SMB signing is enabled, otherwise, if the returned information is False, then SMB signing is disabled.
Conclusion
Please reboot your Linux/Unix server and windows client. If everything is set up correctly, you should be able to access your shared directories from windows.