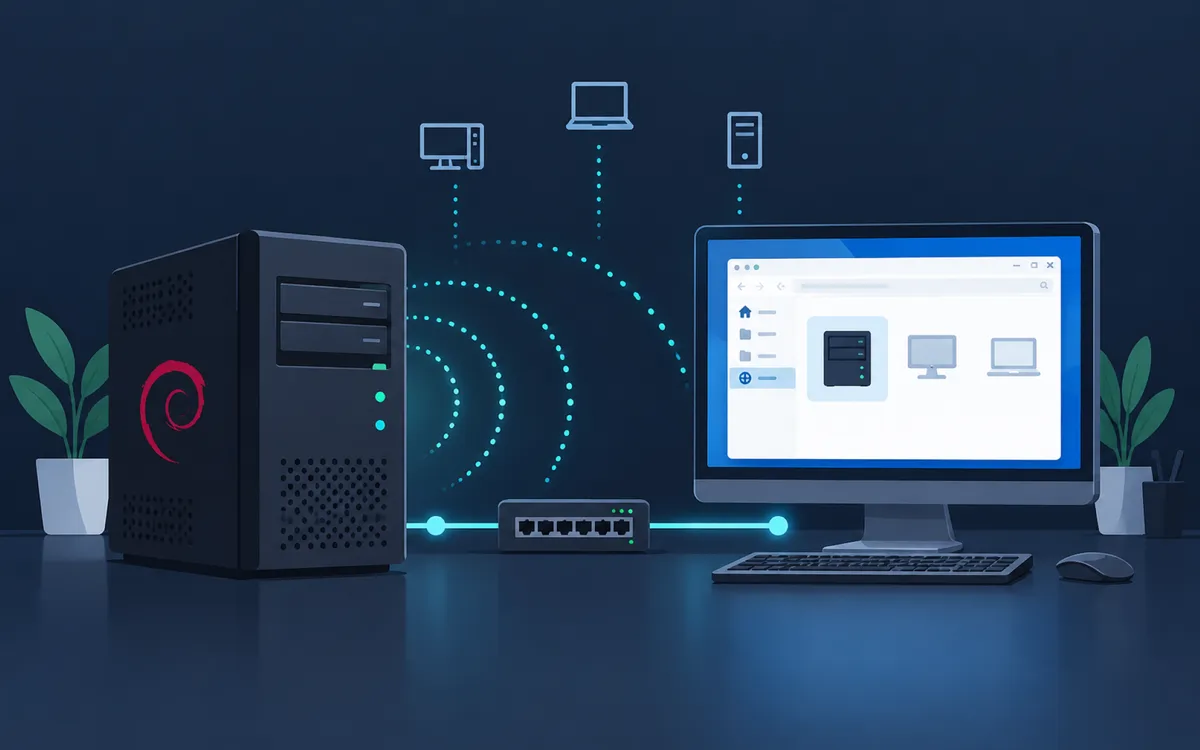
Windows provides a convenient Network view in File Explorer for discovering computers and other devices on the local network. However, Linux systems do not always appear there automatically, even when services such as Samba are installed and working correctly.
This can be confusing because a Samba share may work perfectly when accessed directly:
\\server
while the Linux server itself remains absent from File Explorer > Network.
The reason is that modern versions of Windows use Web Services Dynamic Discovery (WS-Discovery) for much of their network device discovery. Linux systems do not normally advertise themselves using this protocol by default.
wsdd-native solves this problem by implementing WS-Discovery on Unix-like systems. The daemon, named wsddn, advertises the Linux computer to Windows so it can appear alongside other computers in the Windows Network view.
This guide explains how to install and configure wsdd-native on Debian 13, allow it through UFW, verify the service, and troubleshoot common discovery problems.
Requirements
Before beginning, you should have:
- A Debian 13 system
- A Windows 10 or Windows 11 computer on the same local network
- A user account with
sudoprivileges on Debian - Network discovery enabled on Windows
- Internet access on the Debian system for installing the package
- UFW configuration access if UFW is enabled
- Samba installed if you want Windows users to access SMB file shares
wsdd-native does not provide file sharing itself. It provides network discovery.
Samba and wsdd-native perform different jobs:
wsdd-native → makes the Linux computer discoverable by Windows
Samba       → provides SMB file and printer sharing
You can use wsdd-native without Samba, but installing it does not automatically create Windows-accessible file shares.
Before You Begin
Windows network discovery has changed considerably over the years.
Older Windows environments relied heavily on technologies associated with NetBIOS and SMB browsing. Modern Windows systems instead use protocols such as WS-Discovery to locate computers and devices.
A Linux server can therefore be reachable through its IP address or hostname while still being missing from File Explorer's Network view.
For example, this may work:
\\192.168.1.10
or:
\\server
while File Explorer > Network does not display the server.
That does not necessarily indicate a Samba or DNS problem. Windows may simply have no WS-Discovery advertisement telling it that the Linux computer exists.
wsdd-native fills that gap.
The project provides a native C++ daemon called wsddn. On Debian, it integrates with systemd and can run continuously in the background.
Installing wsdd-native does not modify your Samba shares or expose additional directories. It adds a network discovery service.
Why This Works
WS-Discovery is a multicast discovery protocol. Devices advertise and discover services on the local network without requiring a central directory.
wsdd-native implements the WS-Discovery behavior needed to make a Unix system visible to newer Windows systems.
At a simplified level, discovery works like this:
Windows PC
    |
    | WS-Discovery
    v
Local Network
    |
    | discovery response
    v
Debian server running wsddn
Windows sends discovery traffic on the local network. The wsddn daemon responds with information identifying the Debian system.
Windows can then display the computer under:
File Explorer
└── Network
    └── SERVER
According to the wsdd-native project, the daemon can also discover Samba/SMB configuration automatically. It integrates with systemd and is designed so that network operations do not run as root.
WS-Discovery primarily uses:
UDP 3702
TCP 5357
UDP port 3702 is used for WS-Discovery traffic, including multicast discovery. TCP port 5357 is used for the HTTP endpoint associated with discovery metadata.
For IPv4, WS-Discovery uses the multicast address:
239.255.255.250
IPv6 uses:
ff02::c
This is why firewall configuration is an important part of the setup.
Step 1: Install the Repository Prerequisites
wsdd-native provides pre-built Debian packages through the developer's APT repository.
First, update the Debian package index:
sudo apt update
Install the utilities needed to retrieve and process the repository signing key:
sudo apt install wget gnupg
wget downloads the repository key, while GnuPG provides the gpg command used to convert the key into the format expected by APT.
If these packages are already installed, APT will report that they are already at their current versions.
Step 2: Add the wsdd-native Repository Signing Key
APT repositories use cryptographic signing keys so Debian can verify that downloaded package metadata comes from the expected repository.
Import the wsdd-native repository key:
wget -qO- https://www.gershnik.com/apt-repo/conf/pgp-key.public \
  | gpg --dearmor \
  | sudo tee /usr/share/keyrings/gershnik.gpg >/dev/null
This command performs three operations.
wget retrieves the public key and sends it to standard output:
wget -qO- https://www.gershnik.com/apt-repo/conf/pgp-key.public
gpg --dearmor converts the ASCII-armored key into a binary keyring:
gpg --dearmor
Finally, tee writes the keyring to:
/usr/share/keyrings/gershnik.gpg
The repository configuration added in the next step will explicitly reference this key.
Step 3: Add the wsdd-native APT Repository
Create the repository definition:
echo "deb" \
"[arch=$(dpkg --print-architecture) signed-by=/usr/share/keyrings/gershnik.gpg]" \
"https://www.gershnik.com/apt-repo/" \
"base" \
"main" \
  | sudo tee /etc/apt/sources.list.d/wsddn.list >/dev/null
The command automatically determines the system architecture using:
dpkg --print-architecture
For a typical 64-bit Intel or AMD Debian server, this returns:
amd64
The repository also provides packages for arm64 and armhf.
The resulting APT repository definition is stored at:
/etc/apt/sources.list.d/wsddn.list
Using signed-by limits this repository to the signing key installed specifically for it rather than treating the key as globally trusted by APT.
Step 4: Install wsdd-native
Refresh the package index now that the new repository is configured:
sudo apt update
APT should retrieve package information from the wsdd-native repository.
Install the package:
sudo apt install wsddn
The Debian package installs the wsddn daemon along with its service and configuration files.
On the initial Debian installation, the package automatically enables and starts the daemon.
Verify its status:
systemctl status wsddn
A working installation should report a status similar to:
Active: active (running)
Press q to exit the systemctl status display.
You can also check only whether the service is currently running:
systemctl is-active wsddn
The expected result is:
active
Check whether the service is enabled at boot:
systemctl is-enabled wsddn
The expected result is:
enabled
This ensures network discovery returns automatically after the Debian server reboots.
Step 5: Configure UFW
If your Debian system uses UFW, WS-Discovery traffic must be permitted through the firewall.
First check whether UFW is active:
sudo ufw status
If the result shows:
Status: active
allow the application profile installed with wsdd-native:
sudo ufw allow wsddn
Then verify the rule:
sudo ufw status
You should see an entry allowing the wsddn application.
The package-provided UFW profile handles the ports required by the daemon.
If UFW reports:
Status: inactive
there is no need to enable UFW merely for wsdd-native. Firewall policy should be configured according to the security requirements of the server as a whole.
If you use a different firewall, ensure the required WS-Discovery traffic is allowed. wsdd-native requires UDP port 3702 for discovery traffic and TCP port 5357 for its discovery endpoint.
Because WS-Discovery is intended for local network discovery, firewall access should normally remain limited to trusted local networks rather than being exposed unnecessarily to untrusted networks.
Step 6: Review the wsdd-native Configuration
The Debian package installs the main configuration file at:
/etc/wsddn.conf
You can inspect it with:
less /etc/wsddn.conf
The file contains comments explaining the available configuration options.
For many home networks and small server environments, the defaults are sufficient and no changes are required.
The complete command documentation is also available through the installed manual page:
man wsddn
This is particularly useful before changing advanced settings because it describes the configuration options supported by the installed version of wsdd-native.
If you modify /etc/wsddn.conf, reload the daemon:
sudo systemctl reload wsddn
Reloading applies configuration changes without requiring a complete system reboot.
Step 7: Verify Windows Network Discovery
Move to the Windows computer.
Open:
File Explorer
Select:
Network
The Debian computer should eventually appear in the list of discovered computers or devices.
Network discovery is not always instantaneous. Windows may take a short time to refresh its discovery information.
If necessary, refresh File Explorer.
If the Debian server is running Samba, opening the discovered computer should display the SMB shares that the Windows account is permitted to access.
For example:
Network
└── SERVER
    ├── Documents
    ├── Media
    └── Backups
The exact shares depend on your Samba configuration.
Remember that wsdd-native only handles the discovery portion. If the computer appears but its shares cannot be opened, wsdd-native is probably working and the problem is more likely related to Samba, permissions, authentication, or SMB firewall rules.
Verification
A complete verification should check both the Debian service and the Windows client.
On Debian, confirm that the daemon is running:
systemctl is-active wsddn
Expected result:
active
Confirm that it starts automatically:
systemctl is-enabled wsddn
Expected result:
enabled
If UFW is enabled, verify its configuration:
sudo ufw status
You should see the wsddn application allowed.
You can also examine the service log:
journalctl -u wsddn
To show messages from the current boot only:
journalctl -u wsddn -b
To watch the log while testing discovery from Windows:
sudo journalctl -u wsddn -f
Press Ctrl+C when finished.
Finally, verify from Windows that:
- Network Discovery is enabled.
- The Windows network profile is appropriate for local network discovery, normally Private on a trusted home or office LAN.
- The Debian server appears under File Explorer > Network.
- If Samba is configured, opening the server displays the expected shares.
If all of these checks succeed, wsdd-native is functioning correctly.
Troubleshooting
The wsddn Service Is Not Running
Check the service:
systemctl status wsddn
Then inspect its recent logs:
journalctl -u wsddn -b
The journal may identify configuration errors, interface problems, or startup failures.
Try restarting the daemon:
sudo systemctl restart wsddn
Then verify it again:
systemctl is-active wsddn
The Debian Server Still Does Not Appear in Windows
First verify that wsddn is running:
systemctl is-active wsddn
Then check the firewall:
sudo ufw status
If UFW is active, verify that the wsddn rule exists.
Windows Network Discovery must also be enabled. On a trusted local network, Windows should normally use a Private network profile with Network Discovery enabled.
After checking these settings, refresh File Explorer > Network.
The Server Is Reachable but Does Not Appear Under Network
This is exactly the type of problem wsdd-native is designed to address.
For example, if this works:
\\server
but server does not appear in the Network view, SMB connectivity itself may be fine while WS-Discovery is not.
Check:
systemctl status wsddn
and:
sudo journalctl -u wsddn -b
Also verify that UDP 3702 and TCP 5357 are not being blocked between the Windows computer and Debian server.
The Server Appears but Its Shares Do Not Work
If Windows can discover the Debian server, wsdd-native has already performed its primary job.
Problems opening shares should instead be investigated in Samba.
Check Samba services as appropriate for your installation, for example:
systemctl status smbd
You can also review the configured shares:
testparm
A server appearing in Windows Network does not guarantee that SMB authentication, permissions, or share configuration is correct.
Discovery Works on One Network but Not Another
WS-Discovery relies heavily on local multicast traffic.
Routers, VLANs, wireless isolation, firewall rules, and multicast filtering can prevent discovery traffic from crossing network boundaries.
A server and Windows computer located on the same normal LAN will generally be the simplest configuration.
If the devices are separated by VLANs or routed subnets, do not assume WS-Discovery multicast traffic will cross between them automatically.
Direct SMB access may still work:
\\server
or:
\\192.168.1.10
even when automatic discovery does not.
Check the wsddn Log in Real Time
A useful troubleshooting technique is to watch the service log while refreshing Network on Windows:
sudo journalctl -u wsddn -f
This provides a live view of daemon messages.
Press:
Ctrl+C
to stop following the journal.
Common Questions
Does wsdd-native Replace Samba?
No.
wsdd-native provides network discovery.
Samba provides SMB file and printer sharing.
A typical Linux file server used by Windows may therefore use both:
wsdd-native
    |
    └── Network discovery

Samba
    |
    └── File sharing
They complement each other rather than perform the same job.
Do I Need wsdd-native if Samba Already Works?
Not necessarily.
If you are satisfied accessing a Samba server directly with:
\\server
there may be no reason to add another service.
wsdd-native is useful when you want the Linux computer to appear naturally in File Explorer > Network alongside Windows computers and other discoverable devices.
Does wsdd-native Make My Files Public?
No.
Advertising the existence of the computer through WS-Discovery does not create SMB shares or grant access to files.
File access remains controlled separately by services such as Samba and by their authentication and permission settings.
The discovery service does, however, advertise information about the host to devices on the network. It should therefore be used on trusted local networks and restricted appropriately by firewall policy.
Does wsdd-native Start Automatically?
With the Debian package, the daemon is enabled and started automatically on its initial installation.
You can verify this at any time:
systemctl is-enabled wsddn
and:
systemctl is-active wsddn
Both should normally return:
enabled
and:
active
respectively.
How Do I Update wsdd-native?
Because wsdd-native was installed through an APT repository, it can be updated through the normal Debian package-management process:
sudo apt update
sudo apt upgrade
The project documentation notes that package updates preserve the service's existing enabled or disabled state.
Final Thoughts
Modern Windows network discovery and Linux SMB file sharing are related but separate functions. A Linux server can provide perfectly functional Samba shares while remaining invisible in the Windows Network view.
wsdd-native provides the missing WS-Discovery component.
On Debian 13, installation is straightforward: add the project's signed APT repository, install wsddn, permit its traffic through the firewall when necessary, and verify that the systemd service is running.
Once configured, Windows computers on the local network can discover the Debian system through the same Network view used for other computers and devices.
For home labs, small networks, and self-hosted Samba servers where convenient Windows discovery is desirable, wsdd-native provides a focused solution without replacing or modifying the underlying file-sharing service.
About This Guide
This guide explains how to install and configure wsdd-native on Debian 13 so the system can be discovered by Windows through File Explorer's Network view. It is intended for Linux administrators, self-hosters, home lab users, and anyone operating Linux and Windows systems on the same local network.Windows provides a convenient Network view in File Explorer for discovering computers and other devices on the local network. However, Linux systems do not always appear there automatically, even when services such as Samba are installed and working correctly.
This can be confusing because a Samba share may work perfectly when accessed directly:
\\server
while the Linux server itself remains absent from File Explorer > Network.
The reason is that modern versions of Windows use Web Services Dynamic Discovery (WS-Discovery) for much of their network device discovery. Linux systems do not normally advertise themselves using this protocol by default.
wsdd-native solves this problem by implementing WS-Discovery on Unix-like systems. The daemon, named wsddn, advertises the Linux computer to Windows so it can appear alongside other computers in the Windows Network view.
This guide explains how to install and configure wsdd-native on Debian 13, allow it through UFW, verify the service, and troubleshoot common discovery problems.
Requirements
Before beginning, you should have:
- A Debian 13 system
- A Windows 10 or Windows 11 computer on the same local network
- A user account with
sudoprivileges on Debian - Network discovery enabled on Windows
- Internet access on the Debian system for installing the package
- UFW configuration access if UFW is enabled
- Samba installed if you want Windows users to access SMB file shares
wsdd-native does not provide file sharing itself. It provides network discovery.
Samba and wsdd-native perform different jobs:
wsdd-native → makes the Linux computer discoverable by Windows
Samba       → provides SMB file and printer sharing
You can use wsdd-native without Samba, but installing it does not automatically create Windows-accessible file shares.
Before You Begin
Windows network discovery has changed considerably over the years.
Older Windows environments relied heavily on technologies associated with NetBIOS and SMB browsing. Modern Windows systems instead use protocols such as WS-Discovery to locate computers and devices.
A Linux server can therefore be reachable through its IP address or hostname while still being missing from File Explorer's Network view.
For example, this may work:
\\192.168.1.10
or:
\\server
while File Explorer > Network does not display the server.
That does not necessarily indicate a Samba or DNS problem. Windows may simply have no WS-Discovery advertisement telling it that the Linux computer exists.
wsdd-native fills that gap.
The project provides a native C++ daemon called wsddn. On Debian, it integrates with systemd and can run continuously in the background.
Installing wsdd-native does not modify your Samba shares or expose additional directories. It adds a network discovery service.
Why This Works
WS-Discovery is a multicast discovery protocol. Devices advertise and discover services on the local network without requiring a central directory.
wsdd-native implements the WS-Discovery behavior needed to make a Unix system visible to newer Windows systems.
At a simplified level, discovery works like this:
Windows PC
    |
    | WS-Discovery
    v
Local Network
    |
    | discovery response
    v
Debian server running wsddn
Windows sends discovery traffic on the local network. The wsddn daemon responds with information identifying the Debian system.
Windows can then display the computer under:
File Explorer
└── Network
    └── SERVER
WS-Discovery primarily uses:
UDP 3702
TCP 5357
UDP port 3702 is used for WS-Discovery traffic, including multicast discovery. TCP port 5357 is used for the HTTP endpoint associated with discovery metadata.
For IPv4, WS-Discovery uses the multicast address:
239.255.255.250
IPv6 uses:
ff02::c
This is why firewall configuration is an important part of the setup.
Step 1: Install the Repository Prerequisites
wsdd-native provides pre-built Debian packages through the developer's APT repository.
First, update the Debian package index:
sudo apt update
Install the utilities needed to retrieve and process the repository signing key:
sudo apt install wget gnupg
wget downloads the repository key, while GnuPG provides the gpg command used to convert the key into the format expected by APT.
If these packages are already installed, APT will report that they are already at their current versions.
Step 2: Add the wsdd-native Repository Signing Key
APT repositories use cryptographic signing keys so Debian can verify that downloaded package metadata comes from the expected repository.
Import the wsdd-native repository key:
wget -qO- https://www.gershnik.com/apt-repo/conf/pgp-key.public \
  | gpg --dearmor \
  | sudo tee /usr/share/keyrings/gershnik.gpg >/dev/null
This command performs three operations.
wget retrieves the public key and sends it to standard output:
wget -qO- https://www.gershnik.com/apt-repo/conf/pgp-key.public
gpg --dearmor converts the ASCII-armored key into a binary keyring:
gpg --dearmor
Finally, tee writes the keyring to:
/usr/share/keyrings/gershnik.gpg
The repository configuration added in the next step will explicitly reference this key.
Step 3: Add the wsdd-native APT Repository
Create the repository definition:
echo "deb" \
"[arch=$(dpkg --print-architecture) signed-by=/usr/share/keyrings/gershnik.gpg]" \
"https://www.gershnik.com/apt-repo/" \
"base" \
"main" \
  | sudo tee /etc/apt/sources.list.d/wsddn.list >/dev/null
The command automatically determines the system architecture using:
dpkg --print-architecture
For a typical 64-bit Intel or AMD Debian server, this returns:
amd64
The repository definition is stored at:
/etc/apt/sources.list.d/wsddn.list
Using signed-by limits this repository to the signing key installed specifically for it rather than treating the key as globally trusted by APT.
Step 4: Install wsdd-native
Refresh the package index now that the new repository is configured:
sudo apt update
APT should retrieve package information from the wsdd-native repository.
Install the package:
sudo apt install wsddn
The Debian package installs the wsddn daemon along with its service and configuration files.
Verify its status:
systemctl status wsddn
A working installation should report a status similar to:
Active: active (running)
Press q to exit the systemctl status display.
You can check only whether the service is currently running with:
systemctl is-active wsddn
The expected result is:
active
Check whether the service is enabled at boot:
systemctl is-enabled wsddn
The expected result is:
enabled
This ensures network discovery returns automatically after the Debian server reboots.
Step 5: Configure UFW
If your Debian system uses UFW, WS-Discovery traffic must be permitted through the firewall.
First check whether UFW is active:
sudo ufw status
If the result shows:
Status: active
allow the application profile installed with wsdd-native:
sudo ufw allow wsddn
Then verify the rule:
sudo ufw status
You should see an entry allowing the wsddn application.
The package-provided UFW profile handles the ports required by the daemon.
If UFW reports:
Status: inactive
there is no need to enable UFW merely for wsdd-native. Firewall policy should be configured according to the security requirements of the server as a whole.
If you use a different firewall, ensure the required WS-Discovery traffic is allowed:
UDP 3702
TCP 5357
Because WS-Discovery is intended for local network discovery, firewall access should normally remain limited to trusted local networks rather than being exposed unnecessarily to untrusted networks.
Step 6: Review the wsdd-native Configuration
The Debian package installs the main configuration file at:
/etc/wsddn.conf
Inspect it with:
less /etc/wsddn.conf
The file contains comments explaining the available configuration options.
For many home networks and small server environments, the defaults are sufficient and no changes are required.
The complete command documentation is also available through the installed manual page:
man wsddn
This is particularly useful before changing advanced settings because it describes the configuration options supported by the installed version of wsdd-native.
If you modify /etc/wsddn.conf, reload the daemon:
sudo systemctl reload wsddn
Reloading applies configuration changes without requiring a complete system reboot.
Step 7: Verify Windows Network Discovery
Move to the Windows computer and open:
File Explorer
Select:
Network
The Debian computer should eventually appear in the list of discovered computers or devices.
Network discovery is not always instantaneous. Windows may take a short time to refresh its discovery information.
If necessary, refresh File Explorer.
If the Debian server is running Samba, opening the discovered computer should display the SMB shares that the Windows account is permitted to access.
For example:
Network
└── SERVER
    ├── Documents
    ├── Media
    └── Backups
The exact shares depend on your Samba configuration.
Remember that wsdd-native only handles the discovery portion. If the computer appears but its shares cannot be opened, wsdd-native is probably working and the problem is more likely related to Samba, permissions, authentication, or SMB firewall rules.
Verification
A complete verification should check both the Debian service and the Windows client.
On Debian, confirm that the daemon is running:
systemctl is-active wsddn
Expected result:
active
Confirm that it starts automatically:
systemctl is-enabled wsddn
Expected result:
enabled
If UFW is enabled, verify its configuration:
sudo ufw status
You should see the wsddn application allowed.
You can also examine the service log:
journalctl -u wsddn
To show messages from the current boot only:
journalctl -u wsddn -b
To watch the log while testing discovery from Windows:
sudo journalctl -u wsddn -f
Press Ctrl+C when finished.
Finally, verify from Windows that:
- Network Discovery is enabled.
- The Windows network profile is appropriate for local network discovery, normally Private on a trusted home or office LAN.
- The Debian server appears under File Explorer > Network.
- If Samba is configured, opening the server displays the expected shares.
If all of these checks succeed, wsdd-native is functioning correctly.
Troubleshooting
The wsddn Service Is Not Running
Check the service:
systemctl status wsddn
Then inspect its recent logs:
journalctl -u wsddn -b
The journal may identify configuration errors, interface problems, or startup failures.
Try restarting the daemon:
sudo systemctl restart wsddn
Then verify it again:
systemctl is-active wsddn
The Debian Server Still Does Not Appear in Windows
First verify that wsddn is running:
systemctl is-active wsddn
Then check the firewall:
sudo ufw status
If UFW is active, verify that the wsddn rule exists.
Windows Network Discovery must also be enabled. On a trusted local network, Windows should normally use a Private network profile with Network Discovery enabled.
After checking these settings, refresh File Explorer > Network.
The Server Is Reachable but Does Not Appear Under Network
This is exactly the type of problem wsdd-native is designed to address.
For example, if this works:
\\server
but server does not appear in the Network view, SMB connectivity itself may be fine while WS-Discovery is not.
Check the service:
systemctl status wsddn
Then inspect its log:
sudo journalctl -u wsddn -b
Also verify that UDP 3702 and TCP 5357 are not being blocked between the Windows computer and Debian server.
The Server Appears but Its Shares Do Not Work
If Windows can discover the Debian server, wsdd-native has already performed its primary job.
Problems opening shares should instead be investigated in Samba.
Check the Samba service:
systemctl status smbd
Review the Samba configuration:
testparm
A server appearing in Windows Network does not guarantee that SMB authentication, permissions, or share configuration is correct.
Discovery Works on One Network but Not Another
WS-Discovery relies heavily on local multicast traffic.
Routers, VLANs, wireless isolation, firewall rules, and multicast filtering can prevent discovery traffic from crossing network boundaries.
A server and Windows computer located on the same normal LAN will generally be the simplest configuration.
If the devices are separated by VLANs or routed subnets, do not assume WS-Discovery multicast traffic will cross between them automatically.
Direct SMB access may still work:
\\server
or:
\\192.168.1.10
even when automatic discovery does not.
Check the wsddn Log in Real Time
A useful troubleshooting technique is to watch the service log while refreshing Network on Windows:
sudo journalctl -u wsddn -f
This provides a live view of daemon messages.
Press:
Ctrl+C
to stop following the journal.
Common Questions
Does wsdd-native Replace Samba?
No.
wsdd-native provides network discovery.
Samba provides SMB file and printer sharing.
A typical Linux file server used by Windows may therefore use both:
wsdd-native
    |
    └── Network discovery

Samba
    |
    └── File sharing
They complement each other rather than perform the same job.
Do I Need wsdd-native if Samba Already Works?
Not necessarily.
If you are satisfied accessing a Samba server directly with:
\\server
there may be no reason to add another service.
wsdd-native is useful when you want the Linux computer to appear naturally in File Explorer > Network alongside Windows computers and other discoverable devices.
Does wsdd-native Make My Files Public?
No.
Advertising the existence of the computer through WS-Discovery does not create SMB shares or grant access to files.
File access remains controlled separately by services such as Samba and by their authentication and permission settings.
The discovery service does, however, advertise information about the host to devices on the network. It should therefore be used on trusted local networks and restricted appropriately by firewall policy.
Does wsdd-native Start Automatically?
With the Debian package, the daemon is enabled and started automatically on its initial installation.
Verify that it is enabled:
systemctl is-enabled wsddn
Expected result:
enabled
Then verify that it is running:
systemctl is-active wsddn
Expected result:
active
How Do I Update wsdd-native?
Because wsdd-native was installed through an APT repository, it can be updated through Debian's normal package-management process.
Refresh the package lists:
sudo apt update
Then install available package upgrades:
sudo apt upgrade
Final Thoughts
Modern Windows network discovery and Linux SMB file sharing are related but separate functions. A Linux server can provide perfectly functional Samba shares while remaining invisible in the Windows Network view.
wsdd-native provides the missing WS-Discovery component.
On Debian 13, installation is straightforward: add the project's signed APT repository, install wsddn, permit its traffic through the firewall when necessary, and verify that the systemd service is running.
Once configured, Windows computers on the local network can discover the Debian system through the same Network view used for other computers and devices.
For home labs, small networks, and self-hosted Samba servers where convenient Windows discovery is desirable, wsdd-native provides a focused solution without replacing or modifying the underlying file-sharing service.
About This Guide
This guide explains how to install and configure wsdd-native on Debian 13 so the system can be discovered by Windows through File Explorer's Network view. It is intended for Linux administrators, self-hosters, home lab users, and anyone operating Linux and Windows systems on the same local network.